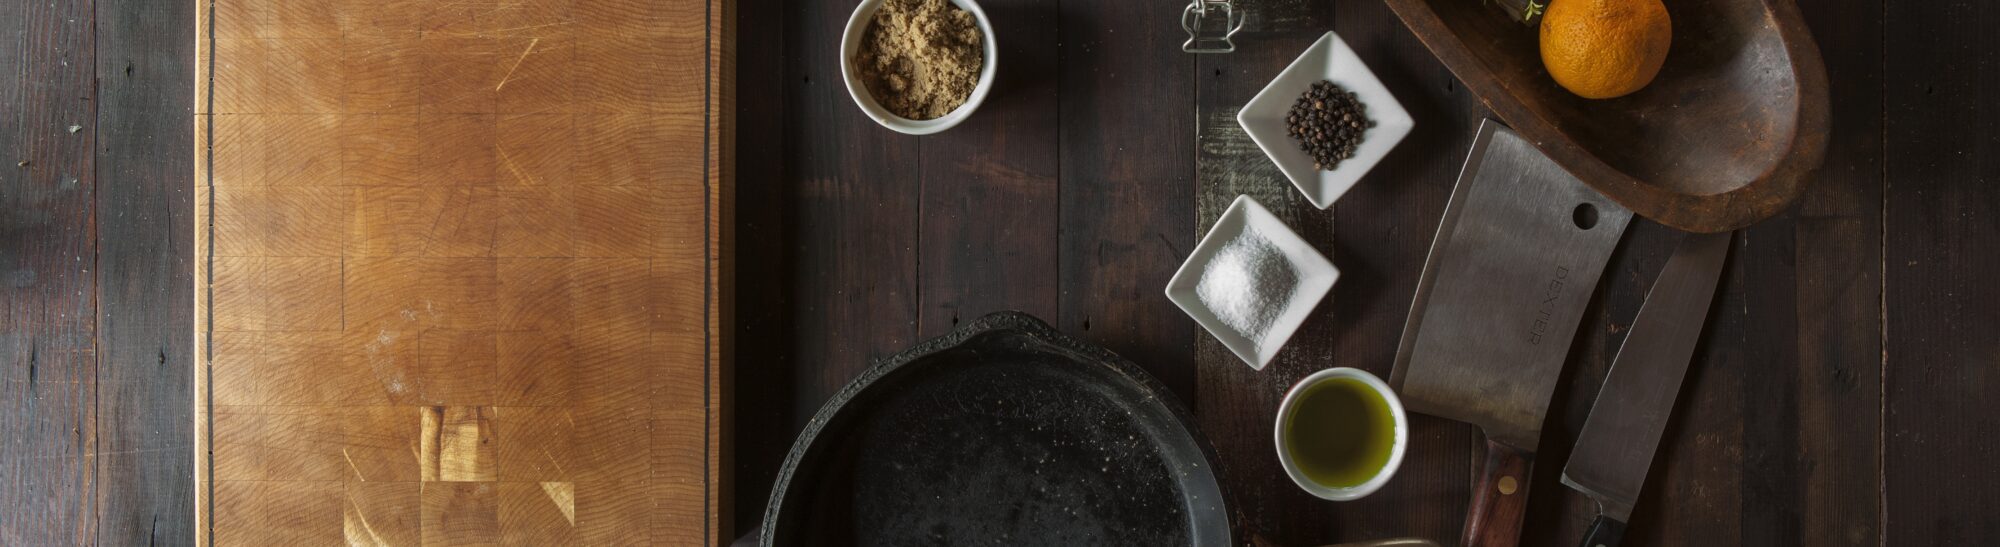
Olivia, Khloe and Lily make Unicorn Brownies in this latest episode of Lily-Rose: Kindergarten Cook! Colorful unicorn chips on top make this a colorful treat!
Preheat oven to 350℉. Line a 9”x9” square pan with parchment paper or prepare a brownie pan.
Place butter and dark chocolate chips into a microwave-safe container and microwave for 1 minute or until melted. Stir to combine.
In a separate bowl, crack eggs and whisk until smooth. Add vanilla. Whisk in cocoa powder and salt.
Add chocolate mixture slowly, whisking constantly. This will keep the warm chocolate from cooking the eggs!
Add sugar and flour, mix to combine. Stir in 1 cup unicorn chips.
Put brownie mixture into the pan and smooth it to the edges.
Bake for 30 minutes for a square pan or 15 minutes for a brownie pan.
Remove from the oven and sprinkle with remaining unicorn chips. Allow the brownies to cool for 30 minutes before removing them from the pan.
24 servings 158 calories per serving
Hack: Brownies are best eaten within 2 days. They can be tightly wrapped and frozen for up to 3 months.
Hack: To see more videos from Lily-Rose and her friends, check out ourYouTube channel! Don’t forget to like, subscribe and press that notification button so you won’t miss any new videos!
So you’re going shopping. You’ve worked out a food budget, made a meal plan and wrote up a shopping list. You confidently go through the store, pick out the items you need and proceed to the checkout.
As the cashier rings up your order, you become increasingly horrified as you watch the total go up and up…and up. Sure, you picked up an extra thing or two. Those cookies were on sale (a bargain, really). The canned anchovies were a threefer…so you got 3. Ok, six. Because you’re sure you can come up with a great way to use them. They don’t go bad, right? And that cake on the clearance rack was too good of a deal to pass up. Someone will eat it.
You leave the store wondering what went wrong. Where did you lose control? How could this possibly have happened?
Don’t beat yourself up. It’s not your fault. You’ve just been marketeered.
Supermarket Tricks of the Trade
Supermarket Tricks of the Trade
It’s a fact. Supermarkets literally pay people to figure out how to get you to buy things you don’t need and never intended to purchase using money that should have gone towards the light bill. Just like any other business, they are out to make as much profit as they possibly can.
Sound devious? Sure, but here’s the problem. You still have to shop there. You’re gonna need to eat. The only way to avoid the pitfalls is to learn how to spot these supermarket tricks of the trade so you can steer clear.
The More You Know
The More You Know
Celebrity endorsements. Food manufacturers will often court celebrities to endorse a certain product with the hope that, if you like that person, you’ll buy the product Sometimes the celebrity simply endorses it, or sometimes it’s a line of products with their name on it The one thing you need to remember is this: Most endorsements are simply a way for celebrities to make a quick buck. It doesn’t mean that they use those products and it’s more likely that they don’t.
Background music. Music affects what or how much consumers buy. Slower and nostalgic music is relaxing and tends to make people linger longer in the grocery store. And the longer you linger, the more you buy.
Clearance Tags. The definition of clearance sale is, “A sale of goods at reduced prices to get rid of superfluous stock or because the shop is closing down” so check the actual discount before you fill up your basket. You may be surprised to find the “clearance price” is often a very small percentage off the regular price.
10 for $10. As luck would have it, these are usually shelf-stable products with a long life like canned tomatoes or tuna so why not save some $$$ and get 10, right? But how much are you really saving? Often not much. Sometimes nothing at all. Take a minute and see how much they cost at full price.
Samples. That tiny sample is not going to fill you up…instead, it’s going to trigger your hunger response and actually make you buy more. It’s the store’s way of making sure you go shopping while you’re hungry.
The Smell of Bread Baking. For the same reasons as above.
All Staples to the Back, Please. Notice that the last time you dashed into the store for a loaf of bread and a gallon of milk, you felt like you’d run a marathon by the time you got to the register? Staples are routinely scattered about in the far corners of your favorite market. That’s so you can walk by and be tempted by all those things you don’t need to get to the few things you do.
And those lines!! When was the last time you left a store because the line was too long? Probably never. Stores walk a fine line between losing a customer and having you wait long enough to be tempted by all the impulse items they have laid out for you. Magazines, gum, candy bars, tables full of cookies and cakes. The longer you have to look at it, the more likely you are to buy it.
Limit 3 Per Customer. This has taken on more meaning during the Pandemic but it’s a tool that’s been used for a long time. When you’re limited, it automatically makes you want more. And if it does sell out? You’re more likely to come back later to get the item you missed. Oh, and you’re also likely to buy more groceries on that trip too.
BOGO. If this was on your list, by all means, take advantage. But “Buy One, Get One” is intended to be a hook to get you to purchase something you hadn’t intended to buy and probably don’t need.
Buy One, Get One Half Off. BOGOs less popular cousin is still a downfall for many. Again, if you were going to buy two anyway, go for it but if not, steer clear. Keep in mind that it’s only a 25% discount. If that item was $4 then the second is $2, which means that you only saved $2. This also means you just spent $2 (or $6) more than you intended to.
Shopping carts at the Entrance. And those carts get larger all the time so it‘s easy to throw that extra thing in. And then another. Before you know it you have to leave because you can’t fit anything else in there without crushing your eggs. Next time you only need a thing or two, just grab a basket. Better yet, leave the basket and then you’ll be limited by how much you can carry in your hands.
There’s a Reason That Stores Keep Getting Bigger. Yes, they can carry more items but it’s also because people don’t like to be crowded. It makes us uncomfortable. We’re more relaxed and will stay longer if we feel that we are being given enough personal space.
It’s the Most Wonderful Time of the Year! Whatever time of year that is for you, it’s a period when people are in a good mood, often have time off and are looking forward to spending time with family and friends. Your favorite supermarket is here to help you celebrate with seasonally themed foods, decorations and music in an effort to encourage you to overspend.
Eat Well and Spend Less
Eat Well and Spend Less
These are just a few of the supermarket tricks of the trade that entice you to spend more than you wanted to. I hope it helps the next time you have to shop. Remember, the more you know, the easier it is to eat well and spend less. And if you do have buyer regret once you get home? Just return the items for a credit or refund. After all, the store is the one who fooled you into buying it in the first place.
What about you? Has this opened your eyes to any strategies that have caused you to buy something you hadn’t intended to buy? Let me know in the comments below!
Peel apples and cut chunks directly off the core and into a large saucepan.
Cover pan and cook over medium-low heat for 30 minutes. Add sugars, lemon juice, cinnamon, nutmeg, cloves and salt. Stir to combine.
Cover and continue to cook for 2 hours, stirring occasionally. Uncover and cook another 30-60 minutes or until thickened, stirring frequently. To test consistency, place a small amount on a plate. If no liquid separates from the apple butter, the correct consistency has been achieved.
Stir in vanilla.
If desired, allow to cool for 30 minutes and then use a blender or stick blender to smooth apple butter.
Serving size: 2 tbsp. 60 calories per serving
Hack: Apple butter will last in the refrigerator for up to 2 months or can be frozen for up to a year.
Cream shortening, peanut butter and brown sugar until well combined and fluffy. Add milk, vanilla and egg. Mix just until combined.
In a separate bowl, mix flour, salt and baking soda. Add to the creamed mixture and stir to combine.
Drop by heaping teaspoonfuls 2 inches apart on an ungreased cookie sheet. Dip a fork in sugar and press lightly twice on one cookie, flattening it slightly to create a crisscross pattern. Repeat for each cookie.
Bake for 7-8 minutes until set and just beginning to brown on the edges. Do not overbake, as cookies will continue to cook on the hot cookie sheet after removing them from the oven.
Allow cookies to rest on the cookie sheet for 2 minutes and then remove to a cooling rack.
Yield: 3 dozen cookies
Hack: Store cookies in a tightly sealed container at room temperature for up to 5 days.
Hack: Cookies can be frozen for up to 3 months. Place cookies on a cookie sheet lined with parchment paper and place them in the freezer until completely frozen. Remove to a sealable freezer bag and place in a freezer-safe container. To thaw, remove the desired number of cookies from the bag and place them on a paper towel-lined plate. Allow to thaw completely before serving.
Lily and Sarah are at it again in this episode of Lily-Rose: Kindergarten Cook! This time, they’re making Milk and Cereal Bars, a Pampered Chef recipe.
Milk and Cereal Bars
(Published by Pampered Chef)
2¼ cups Cheerios™
2 tbsp creamy peanut butter
¼ cup honey or agave nectar
½ cup freeze-dried strawberries
½ cup yogurt chips or white chocolate morsels
Combine the cereal and strawberries in a large mixing bowl.
Microwave the nut butter and honey in a small microwave-safe bowl on HIGH for about 1 minute, or until bubbling. Pour over the cereal mixture and mix well to combine.
Use the Large Scoop to transfer the mixture into wells of the Snack Bar Maker and press down with the Mini Nylon Serving Spatula. Chill the tray in the freezer for about 10 minutes, or in the refrigerator until the bars are set.
Heat the yogurt chips in a microwave-safe bowl until they’ve melted and drizzle over the bars.
Let the bars set in the refrigerator or on the counter.
Yield: 12 servings of bars
Nutrients per serving: U.S. nutrients per serving: Calories 110, Total Fat 3.5 g, Saturated Fat 2 g, Cholesterol 0 mg, Sodium 50 mg, Carbohydrate 19 g, Fiber 2 g, Sugars 12 g, Protein 2 g
Hack: To see more videos from Lily-Rose and her friends, check out ourYouTube channel! Don’t forget to like, subscribe and press that notification button so you won’t miss any new videos!
Place pinto beans in a bowl and cover with cool water. Cover the bowl and soak at room temperature for a minimum of 6 hours and a maximum of 12 hours.
Heat olive oil in a medium-sized saucepan. Add onion and saute until translucent but not brown, 5-7 minutes. Add garlic and simmer until fragrant, about 1 minute.
Add broth, tomato sauce, maple syrup, soy sauce and paprika. Mix well.
Remove rind from salt pork and chop into small pieces. Place in the saucepan with beans and beef broth. Add dried chili pepper, if desired.
Simmer for 1½ to 2 hours, or until tender. Remove chili, add balsamic vinegar and allow to set for 30 minutes before serving. Reheat if necessary.
4 servings, 400 calories per serving
Hack: Serve with rice, cornbread or polenta for a great lunch/dinner or eggs for a hearty breakfast!
Hack: Refrigerate leftovers for up to 5 days or freeze, sealed in serving-sized packages, for later use!
Mandarin Glazed Beets brings together two of my favorite foods: Fresh beets and canned mandarin oranges! What’s your favorite food combo?
Mandarin Glazed Beets
Mandarin Glazed Beets
4 medium beets (2 lbs)
Olive oil
11 oz can of Mandarin oranges, drained, liquid reserved
2 tsp cornstarch
2 tbsp lemon juice
2 tbsp butter
Cut greens off beets, leaving 1” of the stem. Wash thoroughly, brush with olive oil and wrap in aluminum foil. Roast until tender, 50-60 minutes. Remove from the oven and allow to cool. Peel beets and cut into cubes.*
Mix mandarin orange liquid, cornstarch and lemon juice in a medium saucepan. Add butter and turn heat to medium.
Allow the liquid to come to a simmer and cook for 2 minutes or until thickened.
Add beets and cook until warm. Gently stir in oranges and allow to warm.
* Beets can be cooked in advance and stored in the refrigerator for up to 5 days.
4 servings, 190 calories per serving
Hack: If you like this combination of oranges and beets, try this Orange Beet Salad!
Ever wondered about using cooking stones? Here are a few tips and some use/care recommendations as well as my list of the 10 best oven baking stones!
10 Best Oven Baking Stones
This post contains affiliate links that, at no additional cost to you, I may earn a small commission. Read the full privacy policy here.
Baking stones. Either you love ‘em…or you’ve never used ‘em. I was in the second group until I attended a Pampered Chef party. I ended up with a couple of cooking stones because I was curious and wanted to try cooking on them. I think the fact that I’m writing this would make you think I’m now hooked…and you would be right!
In this post, I’d like to go over the basics of oven stones and what I consider to be the 10 best oven baking stones on the market! Buckle up and let’s get this ride started!
What Is An Oven Baking Stone?
Stone Baking Pan
An oven stone is a portable cooking surface that is used for cooking and is one of the oldest cooking techniques known to man. Its history can be traced back to the Early Paleolithic Age between 45,000 to 9,000 BC. And, although we often think of baking stones as a pizza implement, they were first used to cook flatbreads and are still used for that purpose in many parts of the world.
The types I’ll be talking about here are made of clay but they can also be made of ceramic, cordierite, cast iron or stone. While most of us use them in our kitchen oven, they’re also suitable for use on the grill or over an open fire.
Baking stones are not good conductors of heat. This is actually a plus as your food is less likely to burn than when you’re using a glass or metal pan. They also absorb moisture from the bottom of the food, resulting in a crispier bottom.
But…Back To Me
Flat Cooking Stone
As I said before, I got some baking stones at a Pampered Chef party. I was a little skeptical because it just seemed like food would stick. The consultant assured me it wouldn’t so I went ahead and purchased a stone bar pan.
The first thing I did was to cook some teriyaki steak tips. That’s a great test, right? I mean, if anything is going to stick, teriyaki marinade would, right? Nope. The steak was delicious and the stone cleaned up with just a few wipes of my dishtowel.
After such a great experience with the new stone, I tried making a pizza on a stone I had been given a while back but had yet to use. A friend had cooked a naan on it and I was so impressed that she gave me the stone. I lightly oiled the stone, spread the dough over it and confidently put it in the oven to bake.
It stuck like glue.
Luckily, I was using this pizza dough recipe, which makes 2 thin-crust pizzas so I decided to try again.
After a bit of research, I spread some cornmeal over a piece of parchment paper and molded my pizza while my stone heated up in the oven. The stone did smoke, perhaps because I had oiled it previously, but it didn’t set off the smoke detectors so it was fine!
I took the hot stone out of the oven and spread cornmeal over it. I lifted the dough, still on the parchment paper, and carefully turned it over onto the stone, peeling away the paper when I was done.
Taking the stone out of the oven would seem to be a no-no from what I had read, but I really didn’t see any other way to do it. The recommended method of “sliding it onto the stone” is, in my humble opinion, not possible with raw pizza dough.
Anyhow, in it went for a 5-minute pre-bake.
Prebaked Pizza Stone
It came out a bit wonky looking, as you can see, but it didn’t stick so I considered that a win. I covered it with toppings and back in it went for the final bake! The finished result was a perfectly crunchy, New York-style crust.
Homemade Pizza on Pizza Stone
HowTo Use and Clean A Baking Stone
Flat Pizza Stone
As you use your stones, they will darken and develop a smooth, nonstick surface. This is referred to as seasoning.
Using an oven baking stone is fairly straightforward:
Always place the stone in a cold oven and allow it to preheat before using.
Never place frozen or very cold food on a hot stone.
Never place a hot stone on a cold surface. If possible, remove food from the stone to serve and allow the stone to cool in the oven after turning it off. If the hot stone is removed from the oven, place gently on a room-temperature surface.
Don’t oil your stone.
Don’t drop your stone!
Store stone in a cool dry place.
Storing your stone in the oven is not recommended. The repeated heating and cooling of a stone that is not holding food tends to damage the seasoning.
Cleaning my stones depends entirely on what I cook on them. If I bake something that doesn’t leave residues, such as naan or rolls, I just brush off any crumbs and put it away.
If I’m cooking something a bit messier, I allow the stone to cool and clean it off with water and a dishcloth, using a plastic scraper or kitchen brush when necessary. I don’t recommend using soap on unglazed cooking stones, although Pampered Chef stoneware is made with StoneFusion Formula so they can be washed with soap or placed in the dishwasher.
If an unglazed stone needs a deeper clean, I make a baking soda paste (½ cup baking soda to 3 tbsp water) and spread it over the surface of the stone. I allow it to sit for 15 minutes then scrape off the paste and rinse with warm water.
Always allow your stone to dry completely before using or storing it.
10 Best Oven Baking Stones
The Pampered Chef stones that I’ve recommended below are made with StoneFusion Formula. I love them because they’re nonporous so foods and liquids won’t soak in. Once cool, they’re also dishwasher safe, although cleaning them this way will take longer for a seasoned surface to develop. I, personally, clean them in the same way that I clean my unglazed stones.
Take your pizza night to a whole new level! These pizza stones are pre-heat and oven-safe up to 550°F (287°C) so your pizza crust will be perfectly crispy every time. It has been designed with a raised lip on the back edge to make transferring that pizza on and off easier than ever (and keep it from falling off). Integrated handles make the stone easy to grasp and move about.
Get ready for the best cookies—soft in the center, crispy but never burned on the bottom! This stone also turns out the best pizza and flatbreads, appetizers, biscuits and scones, roasted vegetables, garlic bread, brunch braids, and so much more.
Bakers and breadmakers love how yeast bread, pound cakes, banana bread, and quick breads turn out beautifully golden brown and evenly cooked, every time. This versatile pan can also be used to make stuffing, tender and juicy meatloaf, and more.
The scalloped edge and neutral graystone glaze of the Deep Dish Pie Plate beautifully accent pies and casseroles. 9″ diameter, 6-cup capasity. No preheating needed!
This unglazed stoneware is made with a new StoneFusion material making it the strongest and most durable stoneware yet. You can pre-heat, broil, and even put it in the dishwasher. Each piece features a ribbon pattern, so you can easily distinguish it from your original unglazed stones.
This pan is just the right size for packaged brownie mixes and ooey-gooey bar cookie mixes, biscuits, sheet pan dinners, chicken, frozen foods, crispy pizza, or reheating leftovers that are just as good or better than day one. Because the unglazed cooking surface draws moisture away, everything cooks consistently and turns out light and crispy. The integrated handles make it easy to move in and out of the oven.
This pan fits in most countertop ovens including the Deluxe Air Fryer and will be your go-to when heating or reheating small amounts of food. It’s a great size for appetizers, roasted veggies, grilled cheese, and reheat slices of pizza.
Our Stoneware Starter Set will be a great addition to your kitchen! You can make perfect pizzas every time with the Pizza Stone, create easy sheet-pan dinners on the Stone Bar Pan, and bake delicious banana bread in the Stone Loaf Pan.
Time To Get Your Bake On!
Stone Cooked Pizza
If you haven’t tried oven baking stones, I hope you’ll take the plunge and choose one of these stones to begin your new adventure!
If you already use baking stones, please share your experience in the comment section below.