Andouille Sausage With Cabbage

Andouille sausage with cabbage brings together spicy sausage, bacon and green cabbage team up to make this super-easy one-pan meal!

Andouille Sausage With Cabbage

Andouille Sausage With Cabbage

Course Main Course

Ingredients
  

  • 6 slices bacon
  • 4 links fully cooked cajun style andouille sausage
  • 1 red bell pepper
  • 1 green bell pepper
  • 1 onion
  • 3 cloves garlic, minced (1 tbsp)
  • 1 tsp cajun seasoning
  • 1 tsp black pepper
  • 1 small head green cabbage (1 lb)

Instructions
 

  • Using kitchen shears or a sharp knife, cut bacon into small pieces.  Slice sausage into ½” rounds.
  • Cook bacon and sausage in a skillet over medium heat until the sausage is brown and bacon is crispy, 20-25 minutes, stirring frequently.  Remove from pan, leaving drippings, and set aside.
  • Slice peppers and onion.  Add to pan and cook until peppers are tender and onions are translucent 10-12 minutes.  Stir in garlic, cajun seasoning and black pepper.
  • Coarsely chop cabbage into 1” squares.  Add to the pan with peppers and onions.  Cover and cook for 5 minutes.  If the cabbage does not fit in the pan, cover the pan and allow the cabbage to cook down before adding more cabbage.
  • Add sausage and bacon.  Cover and cook until the cabbage is tender.
  • Hack: Store leftovers in the refrigerator for up to 5 days or freeze for up to 3 months.
Keyword Andouille Sausage, bacon, cabbage, cajun, Cajun sausage, dinner, fried cabbage, green cabbage, lunch, one pan meal, one pan recipe, spicy, supper

Did you ever wonder about the roots of Cajun culture?  Get the facts here!

Check out this article to learn more about the benefits of eating cabbage!

Classic Cold Oven Pound Cake

This cold oven pound cake cooks from an oven that’s not preheated to achieve a crispier crust and denser crumb. It will be a popular addition to any gathering!!

Cold Oven Pound Cake

Cold Oven Pound Cake

Course afternoon tea, Dessert, Snack
Servings 16 servings
Calories 420 kcal

Ingredients
  

  • 1 cup butter, room temperature (2 sticks or 8 oz.)
  • ½ cup vegetable shortening
  • 3 cups sugar
  • 5 eggs, room temperature
  • 3 cups flour
  • ½ tsp baking powder
  • 1 cup milk, room temperature
  • 1 tsp vanilla extract
  • 1 tsp almond extract

Instructions
 

  • Do NOT preheat the oven.
  • Generously grease and flour a 10”  bundt pan.
  • Place butter, shortening and sugar into the bowl of a stand mixer.  Beat on medium speed until pale, about 3 minutes.
  • Mix in eggs, one at a time, until smooth.
  • In a separate bowl, sift in the flour and baking powder.
  • Add ⅓ of the flour mixture to the egg mixture, followed by ½ of the milk, beating constantly.  Continue with another ⅓ of the flour mixture, the remaining milk and then the remaining dry ingredients.
  • Stir in vanilla and almond extract.
  • Pour the batter into the prepared pan.  Place in a cold oven and set the temperature to 350℉.  Bake for 70-75 minutes until a toothpick inserted into the center comes out clean or to an internal temperature of 210℉.
  • Remove the cake from the oven and let the pan rest on a cooking rack for 5 minutes.  When that time is up, place a cooking rack of the top of the pan and carefully it over to release the cake.
  • Allow to cool completely before serving.
  • Hack:  A tube pan or 2 standard-sized loaf pans can be used in lieu of a bundt pan.
  • Hack:  Leftovers can be stored at room temperature for up to 4 days, stored in the refrigerator for up to 7 days or frozen, tightly wrapped in serving-sized portions for up to 3 months.
Keyword afternoon tea, bundt cake, childrens recipes, Cooking Cousins, cooking video, dessert, easy, instructional video, Khloe Rose, kid friendly, kids recipe, Kindergarten Cook, Lily Rose, pound cake, quick bread, snack, vanilla cake, yellow cake

Check out the history of pound cake here!

Suggestion: Serve this delightful pound cake with fig chutneyapple butter or vanilla dessert sauce!

Baked Pumpkin Ginger Scones

Pumpkin ginger scones are the perfect treat for any time of day!  The spiciness of ginger blends perfectly with the sweet, earthy taste of pumpkin.  Enjoy!

Pumpkin Ginger Scones

Pumpkin Ginger Scones

Course Breakfast, Dessert, Snack
Servings 12 servings
Calories 270 kcal

Ingredients
  

  • cups flour
  • cups sugar
  • 1 tbsp  baking powder
  • ¾ tsp salt
  • ¾ tsp cinnamon
  • ¼ tsp ginger
  • ¼ tsp nutmeg
  • ¼ tsp allspice
  • ½ cup butter, cold
  • 2 cups crystallized ginger, minced
  • cup canned pumpkin
  • 2 eggs
  • milk for brushing
  • Coarse white sugar for sanding

Instructions
 

  • In a large mixing bowl, whisk together flour, sugar, baking powder, salt, cinnamon, ginger, nutmeg and allspice.
  • Work in the butter just until the mixture is crumbly.  It’s ok if some of the chunks of butter remain unincorporated.  
  • Stir in the crystallized ginger.
  • In a separate bowl, whisk together the pumpkin and eggs until smooth.
  • Stir the pumpkin mixture into the dry ingredients and stir just until the dough holds together.
  • Transfer the dough to a baking sheet lined with parchment paper that’s been lightly dusted with flour.
  • Divide it in half and shape it into two equal circles that are ¾“ high.  They will be 5” to 6” circles.
  • Brush each circle with milk and sprinkle with coarse sugar.  
  • Run a knife or bench scraper under cold water and cut each circle into 6 equal wedges.  Carefully separate wedges so there is about ½“ between each one.
  • Place the scones in the freezer for 20 minutes.
  • While the scones are chilling, preheat the oven to 425℉.  
  • Bake the scones for 22-25 minutes or until their golden brown and a toothpick inserted in the center comes out clean. 
  • Hack:  Scones can be stored tightly covered at room temperature for up to 3 days or frozen for up to 3 months.
  • Hack:  Freeze the leftover pumpkin to use in another recipe.
Keyword afternoon tea, baked, biscuits, bread, breakfast, dessert, easy, ginger, homemade, pastry, pumpkin, quick bread, scone, snack, vegetarian

Did you know?  While the scone is most often associated with British Afternoon Tea, they were originally a Scottish treat.  They officially came to the tea table around 1840, thanks to Anna, the Duchess of Bedford.

Suggestion:  If you love scones, try these lemon barley scones by Lily-Rose Kindergarten Cook!

Fresh Roasted Red Beet Hummus

Roasted red beet hummus is packed with essential nutrients including protein, fiber, folate, manganese, potassium, iron, and vitamin C but low in calories!

Roasted Red Beet Hummus

Roasted Red Beet Hummus

Course Snack
Servings 8
Calories 125 kcal

Ingredients
  

  • cup dried chickpeas
  • 4 cups water, divided
  • 8 oz uncooked red beets
  • 2 tbsp lemon juice
  • 2 cloves garlic, minced (2 tsp)
  • ¼ cup olive oil
  • Salt and pepper to taste

Instructions
 

  • Cover chickpeas with 2 cups of water and allow to soak for 6 - 12 hours. Drain and rinse.
  • Add 2 cups of water and chickpeas to a saucepan. Turn heat to medium. Cover and simmer for 90 minutes or until tender, checking occasionally to ensure there is enough water to keep chickpeas from scorching.
  • Drain any excess water and set chickpeas aside to cool.
  • While the chickpeas are cooking, preheat the oven to 400℉.
  • Cut greens off the beets, leaving 1” of the stem. Wash thoroughly, brush with olive oil and wrap in aluminum foil. Roast until tender, 50-60 minutes.
  • Remove the beets from the oven and allow to cool. Peel the beet and cut it into cubes.
  • Combine chickpeas, beets, lemon juice, garlic and olive oil in a food processor. Pulse until smooth, adding additional olive oil as needed to achieve desired consistency. This step can also be done in batches using a blender.
  • Add salt and pepper to taste.
  • Hack: Leftovers can be stored in the refrigerator for up to 5 days or frozen for up to 4 months.
  • Hack: Freeze in serving-sized portions for a great and easy snack. Thaw in the refrigerator for 24 hours before eating. If thawed hummus is grainy or lumpy after thawing, give it a quick spin in the blender or mini processor to smooth things out.
  • Hack: One 15 oz can of chickpeas can be substituted for the dried chickpeas. It is not necessary to soak or cook the canned chickpeas.
Keyword appetizer, buffet food, chickpeas, easy, football snacks, garbanzo beans, hors d'oeuvres, hummus, party food, red beets, snacks

Did you know?  Colorful foods add up to a healthy diet!  Check out the benefits of beets here!

Suggestion:  If you love beets, try this colorful orange and beet salad!

Classic Boston Baked Beans

This traditional recipe for classic Boston baked beans uses brown sugar and molasses to create a wonderful old-fashioned baked bean flavor.

Classic Boston Baked Beans

Classic Boston Baked Beans

Course Main Course
Servings 10
Calories 244 kcal

Ingredients
  

  • 2 cups dried navy beans (1 pound)
  • ½ lb bacon (8 oz), cut into small pieces
  • ¼ lb salt pork (4 oz), rind removed and cut into small pieces
  • 1 onion, chopped
  • ¼ cup molasses
  • 2 tsp salt
  • ¼ tsp black pepper
  • 1 tsp dry mustard
  • ½ cup ketchup
  • 1 tbsp Worcestershire sauce
  • ¼ cup brown sugar

Instructions
 

  • Cover beans with 2 cups of water and allow to soak for 6 – 12 hours. Drain and rinse.
  • Place the beans in a pan on the stovetop. Add bacon, salt pork, onion, molasses, salt, black pepper, dry mustard, ketchup, Worcestershire sauce and brown sugar.
  • Cover the ingredients with water and bring to a simmer. Simmer for 30 minutes.
  • Pour ingredients into a 2-quart bean pot, cover and place in the oven.
  • Bake a 200℉ for 6-8 hours or until soft.  Add additional water as needed to keep the beans covered.
  • Hack: 1 tbsp prepared mustard can be substituted for the dry mustard.j
  • Hack:  If you don’t have a bean pot, use a heavy, covered casserole dish.
  • Hack:  Store leftovers in the refrigerator for up to 5 days or freeze in individual serving sizes for up to 3 months.  Thaw beans completely before reheating them.
Keyword baked beans, Boston baked beans, dried beans, easy, inexpensive, navy beans

Did you know? Navy beans are a member of the legume family.  Legumes come in many options, are inexpensive and they’re packed with nutrition!!

Suggestion:  Serve these with some fresh homemade butter biscuits!

Saltine Cracker Crack Candy

Saltine cracker crack candy is a buttery sweet crunch covered in chocolate! It’s fast, it’s easy and it only uses 4 ingredients. Lily-Rose gives it a thumbs up!

Saltine Cracker Crack Candy

Saltine Cracker Crack Candy

Course Snack
Servings 35
Calories 135 kcal

Ingredients
  

  • 1 sleeve of saltine crackers (about 40 or 4 ounces)
  • 1 cup brown sugar
  • 1 cup butter (8 oz or 2 sticks)*
  • 2 cups semi-sweet chocolate chips (1 bag or 12 oz)
  • *If using unsalted crackers and/or butter add ¼ tsp salt

Instructions
 

  • Preheat oven to 400℉.
  • Line a 10"x15" baking pan with nonstick aluminum foil.  If using regular aluminum foil, coat it with cooking spray.
  • Arrange a single layer of saltine crackers over the bottom of the pan.
  • Place the brown sugar and butter into a saucepan and cook, stirring constantly, until the mixture comes to a full boil. Allow to cook for 3 minutes, stirring constantly.
  • Pour the hot caramel mixture over the crackers and use a spatula to spread it evenly, covering all the crackers. 
  • Put the pan in the oven and bake for 4-5 minutes or until the caramel is bubbly.  Remove it from the oven and turn off the heat. 
  • Allow pan to rest for 1 minute.
  • Sprinkle the chocolate chips over the caramel.  Use a spatula to evenly distribute and gently press chips into the caramel.  
  • Put the pan back in the hot oven for 1-2 minutes.  Remove and use a spatula to spread the chocolate evenly over the caramel crackers.
  • Place the pan on the refrigerator 2 at least two hours.
  • Peel the candy off the aluminum foil and break it apart with your hands to serve.
  • Hack:  Switch this up by using different crackers, such as butter-flavored or graham crackers.  
  • Hack: Use your favorite chocolate (milk, dark or white) in place of the semi-sweet chips.  You can also leave the chocolate off entirely if you prefer.
  • Hack:  Add some fancy pizazz by sprinkling chopped nuts, crushed hard candy or sprinkles over the top of the melted chocolate.  Gently press them into the chocolate before refrigerating.
  • Hack:  Store leftovers in the refrigerator for up to a week or freeze them for up to 3 months.
Keyword candy, childrens recipes, chocolate chips, cooking video, crack, crunchy, homemade, instructional video, kid friendly, kids recipe, Kindergarten Cook, Lily Rose, saltine crackers, sweets

Did you know?  Chocolate was originally served as a warm (and bitter) drink!  Check out some more fun facts about chocolate here!

These classic no-bake cookies are another fast and easy snack that the
the kids will enjoy making!

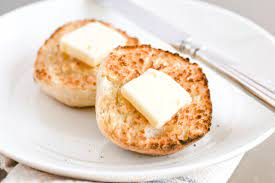
Easy Homemade English Muffins

Sure, you can pick up a package at the store but these easy homemade English muffins are super fresh and tasty with some jam or chutney!

Easy Homemade English Muffins

Easy Homemade English Muffins

Course Bread
Servings 1 muffin
Calories 179 kcal

Ingredients
  

Starter:

  • ¾ cup water
  • tsp yeast
  • ¼ tsp sugar
  • cup all-purpose flour

English Muffin Dough:

  • ¾ cup milk
  • 2 tbsp butter
  • 2 tbsp sugar
  • 1 tsp yeast
  • cups all-purpose four
  • 2 tbsp cornstarch
  • 1 tsp salt
  • 2 tsp baking powder

Instructions
 

Starter:

  • In a small microwave-safe bowl, mix water and sugar.  Heat in microwave to a temperature of between 110℉ - 115℉.  This should take less than a minute and it’s very important to use a thermometer to get the correct temperature.
  • Dissolve yeast in water mixture and set aside for 7 minutes to proof.  Normally, I would look for a foam to form on the top but in this case, because of the small amount of yeast, the blooming will not be obvious.
  • Mix the flour with the yeast mixture.  Cover and leave it at room temperature for at least 4 hours or up to 16 hours.  It will be fluffy and full of bubbles.

English Muffins:

  • In a small microwave-safe bowl, mix milk, butter and sugar.  Heat in microwave to a temperature of between 110℉ - 115℉.  This should take less than a minute and it’s very important to use a thermometer to get the correct temperature.
  • Dissolve yeast in milk mixture and set aside for 7 minutes to proof.  It should “bloom” or form a foam on top.
  • In the bowl of a stand mixer, place the flour, cornstarch, salt and baking powder.  Add starter and bloomed yeast mixture.  Beat on low speed for 8 minutes.
  • Cover and let rise for 1½ hours.
  • Preheat a skillet to 325℉. Place English muffin rings (I used silicone egg rings) on the skillet and spray lightly with cooking spray.  Pour ¼ cup of batter into each ring and “swish” it around a bit to spread it out.
  • Cook undisturbed for 10-15 minutes until a skin forms on the upper side of the muffin.  Remove the ring, flip the muffins and cook for another 5-7 minutes or until the internal temperature reaches 200℉.
  • Transfer muffins to a rack and allow to cool completely.  For the best flavor, store in a tightly covered container or plastic bag overnight before eating.  
  • Hack:  If you prefer to bake these in the oven, reduce the initial rising time to one hour.  Place rings on a baking sheet and coat lightly with cooking spray.  Pour ¼ cup of batter into each ring, cover and let rise for an additional hour.  Bake in a preheated 350℉ oven for 25 minutes or to an internal temp of 200℉.
  • Hack: If you don’t have rings, you can make these without them.  The edges will not be as well-defined but they will still taste great!
  • Hack:  Store English muffins at room temperature for 1-2 days, in the refrigerator for up to 4 days or in the freezer for up to 8 weeks.
Keyword bread, breakfast, easy, english muffin, fried, homemade, sandwich, simple, skillet, toast, yeast


While the origin of the English muffin is uncertain, the name is strictly American.  The British version is known as a “crumpet”.  Check out some more fun facts here!

Suggestion:  Serve these with some old-fashioned apple butter or fig chutney!

Super Easy Peanut Butter Bread

This super simple and easy peanut butter bread is a fresh take on a depression-era staple. It’s perfect for breakfast, snack time or anytime!

Easy Peanut Butter Bread

Easy Peanut Butter Bread

Course Bread, Snack
Servings 8
Calories 475 kcal

Ingredients
  

  • 2 cups all-purpose flour
  • ½ tsp salt
  • 1 tsp baking powder
  • 1 cup peanut butter
  • 1 egg, room temperature
  • ¾ cup sugar
  • 1 cup applesauce
  • ½ cup milk, room temperature
  • ½ tsp baking soda

Instructions
 

  • Preheat oven to 350℉. Coat a standard loaf pan with cooking spray.
  • Whisk together flour, salt and baking powder.  
  • Add peanut butter to the flour mixture.  Use your hands to blend the components together to form a crumble texture.
  • In the bowl of a stand mixer, beat the egg and sugar on high until pale.  
  • Turn the mixer to medium speed and add applesauce and milk to the egg mixture. Stir in baking soda.
  • Add the wet ingredients to the dry ingredients. Stir just until combined.  The batter may be lumpy.
  • Pour mixture into loaf pan and bake until the internal temperature reaches 200℉ or until a toothpick inserted in middle comes out clean, 60-70 minutes.)
  • Let the cake rest on a cooling rack for 5 minutes and then turn it out of the pan.
  • Allow to cool completely before slicing.
  • Hack: Do not use natural or organic peanut butter in the recipe. The emulsifiers contained in shelf-stable peanut butter are necessary for the success of this bread!
Keyword baking soda, breakfast, brunch, buffet, classic, easy, oven baked, peanut butter, quick bread, snack, traditional, vegetarian

Did you know? While many worry about the fat and calorie content of peanut butter, studies show that its nutritional profile can be a valuable part of a healthy eating plan!

Suggestion:  These old-fashioned peanut butter cookies are another classic recipe made from the classic staple!

Original Rice Krispies Treats™

Rice Krispies Treats™ is a classic recipe that we all remember fondly from our childhood. This no-bake recipe uses only 4 ingredients and your littles can help!

Original Rice Krispies Treats™

Original Rice Krispies Treats™

Course Dessert, Snack
Servings 12
Calories 265 kcal

Ingredients
  

  • 6 cups Rice Krispies™ cereal
  • 1 package Mini M&Ms;™, optional (10 ounce or 1½ cups) 
  • 3 tsp butter
  • 1 bag marshmallows (10 oz or about 40)

Instructions
 

  • Use cooking spray to coat a 10”x13” pan.
  • Measure Rice Krispies™ and Mini M&Ms;™ into a large bowl and stir to combine.
  • Put the marshmallows and butter into a separate large bowl.  Place in the microwave and heat on full power for 2 minutes.*  Stir until marshmallow and butter are well combined.
  • Add the cereal mixture to the marshmallow and stir quickly to combine.  
  • Use a buttered spatula, waxed paper or buttered hands to gently press the mixture into the prepared pan.  
  • Allow to cool and cut into 2” squares for serving.
  • *This step can also be done on the stovetop.  Place marshmallows and butter in a large pan.  Heat over low heat, stirring constantly, until the marshmallows are melted and smooth.
  • Hack:  Store leftovers in a tightly covered container at room temperature for up to 2 days.  Separate layers with waxed or parchment paper.  They can also be tightly wrapped and frozen for up to 6 weeks.
  • Hack:  Experiment by using flavored marshmallows, food coloring (added to melted marshmallows) and/or different stir-ins such as candies, nuts or sprinkles.  Go crazy and let me know how they turn out!
Keyword candy, childrens recipes, Cooking Cousins, cooking tutorial, cooking video, dessert, easy, easy prep, fast and easy, Khloe Rose, kid friendly, kids recipe, Kindergarten Cook, Lily Rose, M&M, Marshmallow, no bake, quick and easy, Rice Krispies, snack

Did you know?  Marshmallows were originally made from the sap of the mallow plant and enjoyed only by royalty.  Check out some more fun facts here!

To see more videos from The Cooking Cousins and their friends, check out our YouTube channel!  Don’t forget to like, subscribe and press that notification button so you won’t miss any new videos!

Suggestion:  Milk and cereal bars are another easy, no-bake goodie for your littles to make!

Low Carb Chicken Pizza Crust

This low carb chicken pizza crust is incredibly easy to put together and will have your meal on the table in less than 30 minutes!

Low Carb Chicken Pizza Crust

Low Carb Chicken Pizza Crust

Course Main Course
Servings 2
Calories 270 kcal

Ingredients
  

  • cups cooked chicken, finely shredded
  • ¼ cup parmesan cheese
  • 1 egg
  • ½ tsp salt
  • ¼ tsp black pepper
  • ½ tsp onion powder, optional
  • ½ tsp garlic powder, optional

Instructions
 

  • Preheat oven to 500℉.
  • Place chicken into a bowl. Add cheese and egg. Stir to combine.
  • Pour the mixture onto a baking sheet lined with parchment paper. Shape into a 6”-8” circle.  The thinner, the crisper the crust.
  • Bake for 5-8 minutes until there are no wet spots on the crust.
  • Cover with desired toppings and cheese.  Bake for 8 more minutes or until the cheese is melted.
  • Hack:  You can substitute one 10 oz can of chicken for this recipe. Open and drain the canned chicken.  Spread it on a parchment-lined baking pan and bake at 350℉ for 10 minutes.  Cool and continue with the recipe.
Keyword chicken, crust, easy, easy meal, easy prep, fast and easy, healthy, high protein, keto, low calorie, low carb, pizza, quick and easy

Did you know?  Chicken is a great source of protein and has been linked to a variety of health benefits.

Suggestion:  This low carb cauliflower pizza crust is another great way to follow enjoy pizza on a keto meal plan!

error

Enjoy this blog? Please spread the word :)

Follow by Email
YouTube
YouTube
Pinterest
Pinterest
fb-share-icon
LinkedIn
LinkedIn
Share
Instagram